Community Sharpening Journal

Discuss Spyderco's products and history.
User avatar
RustyIron
Member
Posts: 2437
Joined: Mon Mar 18, 2019 9:01 pm
Location: La Habra, CA
Contact:

Re: Community Sharpening Journal

#101

Post by RustyIron »

Pelagic wrote:
Sat Oct 12, 2019 3:00 am
RustyIron, what stone does Ken Schwartz recommend specifically for Maxamet?
Your BEST bet, Pela, is to call Ken and tell him what you're doing, what you're using, what you're doing it on, and what you want the finished edge to be. You can get his number on Facebook "Precise Sharpening." I'd rather not post his number publicly. For what I'm doing, he's sending a couple hard platinum Nubatama's. He says they will cut nicely on high-vanadium material and are good for those who can maintain a precise angle. I'm eager to try them on S110V, as well. You should call him direct so you can get real expert advice, rather than second-hand info from a guy like me who is still in the steep part of the learning curve.

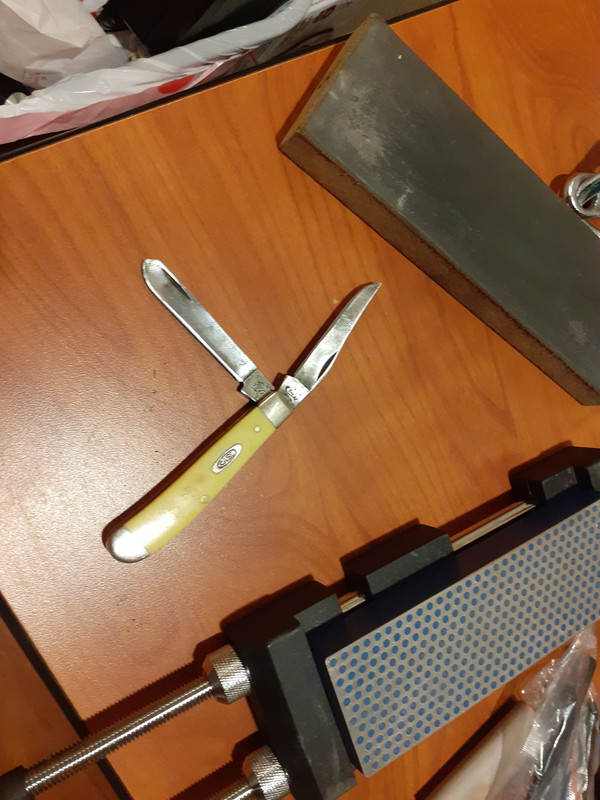
The edge in the picture was created with 400 bamboo, 1k gold, 2k blue speckled, 5k bamboo, 8k speckled ume, and then 1μ and 0.25μ on nanocloth. I used those because they're my go-to lineup, but wasn't certain they'd cut well on the Maxamet. I'm pretty happy with the way the blade came out. It looks beautiful and grabs fingerprints nicely. The very edge has microscopic chipping, but I don't yet know if that's a characteristic of the material. I'll use the blade as-is for a couple weeks, then touch it up with the new stones. They'll leave a coarser, toothier edge. Afterwards, I'll do a writeup here with the results of the experiments.
Doeswhateveraspidercan
Member
Posts: 2618
Joined: Tue Jul 10, 2018 6:31 pm

Re: Community Sharpening Journal

#102

Post by Doeswhateveraspidercan »

I just recently received my Spyderco Diamond Sharpmaker rods and compared the diamond grits to the old diamond Duck Footed sharpener.

As far as I can tell even under a USB Microscope connected to my computer they look identical as far as grit structure goes or not very different and they feel just about identical when sharpening an S90V blade on them.

Thought people might enjoy the comparrison.

Image

Image

This is a picture under USB Microscope of the Diamond Plated Duck Foot Sharpener:

Image

This is a picture of the Diamond rod:

Image
User avatar
Bloke
Member
Posts: 5425
Joined: Fri May 13, 2016 12:43 am
Location: Sydney, Australia.

Re: Community Sharpening Journal

#103

Post by Bloke »

The Meat man wrote:
Sat Oct 12, 2019 8:15 am
Thanks Alex!

Great post about flattening stones. It's something I seriously need to do.
Have you ever flattened bonded diamond stones? If so any recommendations?
You’re most welcome mate! :)

Yes, Venev bonded Diamond or CBN hones are bonded with resin I believe and are easy to flatten using the exact same process. Just don’t use too fine a grit of loose SiC. For example, 320 loose grit will flatten a 1200grit Venev quick smart. :cool:
A day without laughter is a day wasted. ~ Charlie Chaplin
Doeswhateveraspidercan
Member
Posts: 2618
Joined: Tue Jul 10, 2018 6:31 pm

Re: Community Sharpening Journal

#104

Post by Doeswhateveraspidercan »

With the arrival of the Diamond Rods for reprofile work, I attached my digital angle cube to them after zeroing out on the base of the sharpmaker.

With this in place was able to adjust the height on either side to achieve lower angles very easily. Really surprising how high you have to prop up on side at a time to get down to 10 degrees.
Doeswhateveraspidercan
Member
Posts: 2618
Joined: Tue Jul 10, 2018 6:31 pm

Re: Community Sharpening Journal

#105

Post by Doeswhateveraspidercan »

Here are a couple of pictures showing what I was describing.

Image

Image
User avatar
Sharp Guy
Member
Posts: 8602
Joined: Tue Jan 26, 2016 2:19 pm
Location: DFW, TX (orig. from N. IL)

Re: Community Sharpening Journal

#106

Post by Sharp Guy »

Doeswhateveraspidercan wrote:
Mon Oct 14, 2019 9:07 am
With the arrival of the Diamond Rods for reprofile work, I attached my digital angle cube to them after zeroing out on the base of the sharpmaker.

With this in place was able to adjust the height on either side to achieve lower angles very easily. Really surprising how high you have to prop up on side at a time to get down to 10 degrees.
You can also use shim stock behind the stones to prop them up. That way you can adjust both sides at the same time. I think it's more consistent that way.
Of all the things I've lost I miss my mind the most!
Doeswhateveraspidercan
Member
Posts: 2618
Joined: Tue Jul 10, 2018 6:31 pm

Re: Community Sharpening Journal

#107

Post by Doeswhateveraspidercan »

Sharp Guy wrote:
Mon Oct 14, 2019 11:00 am
Doeswhateveraspidercan wrote:
Mon Oct 14, 2019 9:07 am
With the arrival of the Diamond Rods for reprofile work, I attached my digital angle cube to them after zeroing out on the base of the sharpmaker.

With this in place was able to adjust the height on either side to achieve lower angles very easily. Really surprising how high you have to prop up on side at a time to get down to 10 degrees.
You can also use shim stock behind the stones to prop them up. That way you can adjust both sides at the same time. I think it's more consistent that way.
I am afraid I don't quite follow do you have an example you could share? a picture perhaps?
User avatar
Sharp Guy
Member
Posts: 8602
Joined: Tue Jan 26, 2016 2:19 pm
Location: DFW, TX (orig. from N. IL)

Re: Community Sharpening Journal

#108

Post by Sharp Guy »

Doeswhateveraspidercan wrote:
Mon Oct 14, 2019 11:08 am
Sharp Guy wrote:
Mon Oct 14, 2019 11:00 am
Doeswhateveraspidercan wrote:
Mon Oct 14, 2019 9:07 am
With the arrival of the Diamond Rods for reprofile work, I attached my digital angle cube to them after zeroing out on the base of the sharpmaker.

With this in place was able to adjust the height on either side to achieve lower angles very easily. Really surprising how high you have to prop up on side at a time to get down to 10 degrees.
You can also use shim stock behind the stones to prop them up. That way you can adjust both sides at the same time. I think it's more consistent that way.
I am afraid I don't quite follow do you have an example you could share? a picture perhaps?
I don't have a picture at the moment. Look at your picture. See where the point of the triangle on the rods is resting in the point of the hole in the base? You can fold pieces of shim stock around the point of the rod to effectively raise the angle it's sitting at. I have a pack of brass shim stock that I bought at the hardware store years ago. I think it comes in .001, .002, .003, .004, .005" small sheets. I cut small squares approximately 1" x 1" and fold in half so there's a crease down the middle. Then I stack a few and place them around the point at the back of the rod (tip the rod forward and slide it in there). I try different thickness combinations and measure with my angle cube until I get the angle I want.

I figured this out when making the custom bases. The stones all vary in thickness and it effects the angle they sit at in the base. Typically they're close enough for most peoples use and isn't a big deal if you don't know any better. But some of us (like myself) are OCD about things like this. So using the shims behind the rods is a good way to even them up. Kind of a pain but that's what we get for being OCD. :)
Of all the things I've lost I miss my mind the most!
Doeswhateveraspidercan
Member
Posts: 2618
Joined: Tue Jul 10, 2018 6:31 pm

Re: Community Sharpening Journal

#109

Post by Doeswhateveraspidercan »

Oh I see what you are describing now, thank you very much I will give this a try it is certainly a better idea and far more stable way of doing things.

Yeah on the OCD when I saw 15.4 degrees I was a little grrrr you've got to be kidding me 15 degrees is 15 degrees not 15.4 Lol.

Nice knowing how to correct that. Thanks
vivi
Member
Posts: 13846
Joined: Mon Oct 29, 2007 8:15 am

Re: Community Sharpening Journal

#110

Post by vivi »

Doeswhateveraspidercan wrote:
Mon Oct 14, 2019 10:35 am
Here are a couple of pictures showing what I was describing.

Image

Image
Try sharpening a PE knife with those then cutting with it. No grit progression.

That's what I did to my Manix XL last night. I had been sharpening it on my DMT X coarse but the diamond rods felt even coarser, so I gave them a shot. Normally I only reprofile with them.

The Manix I sharpened at 15 dps using super gentle strokes. Managed to get it to where it could roughly shave. Stropped once per side. It cuts very nicely.

I'm really enjoying these toothier edges for a variety of reasons. Sharpening is quicker since the lower grits work faster and I'm not progressing through grits. They are very sticky edges that grab material and hold on. They cut much differently than the polished edges off the whites.

Another thing I like about these edges is I can go a lot longer between sharpenings. Even once they lose all shaving ability they still cut very well. It's been nice not worrying about keeping my knife at peak sharpness. A toothy edge that's been dulled a bit still cuts fine, much better than a polished edge that's a little dulled.

In fact I took my SE Pacific Salt back to the diamond rods even though it was still sharp. I wanted to grind off the semi-polished microbevel I gave it and go to a raw 15 degree diamond finish edge.

I'm going to leave both these knives like this for a while and see how they do. They're both super toothy and shaving sharp.
:unicorn
Doeswhateveraspidercan
Member
Posts: 2618
Joined: Tue Jul 10, 2018 6:31 pm

Re: Community Sharpening Journal

#111

Post by Doeswhateveraspidercan »

Ill break out my Manix XL and give it a shot. I have a Strop from Knives plus in the white and the green White being more coarse. What type of strop and compound are you using?
vivi
Member
Posts: 13846
Joined: Mon Oct 29, 2007 8:15 am

Re: Community Sharpening Journal

#112

Post by vivi »

Doeswhateveraspidercan wrote:
Mon Oct 14, 2019 1:31 pm
Ill break out my Manix XL and give it a shot. I have a Strop from Knives plus in the white and the green White being more coarse. What type of strop and compound are you using?
I'm using an old leather strop with green chromium oxide buffing compound. Nothing fancy. I strop once per side primarily to see how aggressive of a burr I've left. If neither side scrape off compound from a freshly loaded strop, it's a good edge. Works a little better than eyeballing it.
:unicorn
Doeswhateveraspidercan
Member
Posts: 2618
Joined: Tue Jul 10, 2018 6:31 pm

Re: Community Sharpening Journal

#113

Post by Doeswhateveraspidercan »

I am going to have to wait until tomorrow night to try this tonight just became very busy.
Doeswhateveraspidercan
Member
Posts: 2618
Joined: Tue Jul 10, 2018 6:31 pm

Re: Community Sharpening Journal

#114

Post by Doeswhateveraspidercan »

oh and I am thinking since you already free-handed your Xl quite a bit down to 10 degrees as I recall I will do this as well I have a couple of Atoma plates 400 & 600 arriving tomorrow with a sink board, please correct me if I am wrong but re-profile down to 10 degrees then 15 degrees on the sharp-maker diamonds correct?

Probably will not get to the sharp-maker rods the first night as the re-profile should take some time. Will post pictures of progress. :)
User avatar
Bloke
Member
Posts: 5425
Joined: Fri May 13, 2016 12:43 am
Location: Sydney, Australia.

Re: Community Sharpening Journal

#115

Post by Bloke »

Doeswhateveraspidercan wrote:
Mon Oct 14, 2019 10:35 am
what I was describing.

Image
Does, you’re a barking maniac! :p

All you need to do now is, set up a theodolite to insure you’re holding the knife 100% vertically plumb through the entire stroke you take on the stone and you should be right. Ah, hahaha, ah, hahaha, ah, hahaha! :)
A day without laughter is a day wasted. ~ Charlie Chaplin
Doeswhateveraspidercan
Member
Posts: 2618
Joined: Tue Jul 10, 2018 6:31 pm

Re: Community Sharpening Journal

#116

Post by Doeswhateveraspidercan »

Bloke wrote:
Doeswhateveraspidercan wrote:
Mon Oct 14, 2019 10:35 am
what I was describing.

Image
Does, you’re a barking maniac! :p

All you need to do now is, set up a theodolite to insure you’re holding the knife 100% vertically plumb through the entire stroke you take on the stone and you should be right. Ah, hahaha, ah, hahaha, ah, hahaha! :)
Ah, hahaha, ah, hahaha, ah, hahahaha! :)

OCD begone I doth say be gone!!!!
vivi
Member
Posts: 13846
Joined: Mon Oct 29, 2007 8:15 am

Re: Community Sharpening Journal

#117

Post by vivi »

Doeswhateveraspidercan wrote:
Mon Oct 14, 2019 5:43 pm
oh and I am thinking since you already free-handed your Xl quite a bit down to 10 degrees as I recall I will do this as well I have a couple of Atoma plates 400 & 600 arriving tomorrow with a sink board, please correct me if I am wrong but re-profile down to 10 degrees then 15 degrees on the sharp-maker diamonds correct?

Probably will not get to the sharp-maker rods the first night as the re-profile should take some time. Will post pictures of progress. :)
Yep that's what my XL has going on at the edge.
:unicorn
Doeswhateveraspidercan
Member
Posts: 2618
Joined: Tue Jul 10, 2018 6:31 pm

Re: Community Sharpening Journal

#118

Post by Doeswhateveraspidercan »

Thanks Vivi I think I am going to be better off using the 400 Atoma with a water table and the sink than the Sharpmaker rods trying to re-profile down to 10 Degrees. I wonder how long something like that with S30V takes? I will be using my wedgeks to assist my poor free-handing skills and hopefully get some muscle memory going.

Might be a few days till I get this project started, taking out the trash in the dark last night wearing flip flops I smashed my big toe at full speed into a heavy duty metal hasp I installed into the driveway next to the garage door to secure the generator during our last almost hurricane.

Needless to say I was hopping mad at myself for not putting the hasp up until needed again as the blood went flying form an expertly clobbered toe. Yeah not real happy with myself today especially since it only took 30 seconds with the cordless and a screwdriver bit to pull up.
User avatar
Pelagic
Member
Posts: 2440
Joined: Fri Apr 27, 2018 5:49 pm
Location: East Coast/Nomadic

Re: Community Sharpening Journal

#119

Post by Pelagic »

I sharpened an old case knife today. An engineer came up to me and said "I heard you're good at sharpening knives". I replied "I'm ok". And he said "well I can't do it worth a **** so check this out" and gave me and old 2 blade carbon steel Case knife that really took me back to the times where those knives were highly sought after. It's strange watching someone observe your technique and ask questions, despite me knowing the answers and volunteering any and all information about basic sharpening along the way. One of the blades was a clip point basically and one had a tip like a Borong (some of you will know what knife I'm talking about already), and I had to spend extra time on the tip as well as the surrounding belly as it was very dull. All I had with me on the dredge was my DMT coarse and a 3 micron strop, which in my opinion is more than enough for anyone's needs. This is one of those guys that thinks shaving sharp is extremely sharp (99% of the world). While the Borong-like tip was a PITA to sharpen properly it came out well. Simple carbon steel takes a great edge.

Image
Pancake wrote:
Wed Aug 14, 2019 10:20 pm
Are you a magician? :eek:
Nate wrote:
Thu Apr 04, 2019 4:32 pm
You're the lone wolf of truth howling into the winds of ignorance
Doeswhateveraspidercan wrote:
Sat Jun 15, 2019 9:17 pm
You are a nobody got it?
User avatar
jpm2
Member
Posts: 1323
Joined: Sat Apr 15, 2017 7:40 pm
Location: TX - in the sticks

Re: Community Sharpening Journal

#120

Post by jpm2 »

Clip and spey blades.
Post Reply