Sharpening a Vagabond

Discuss Spyderco's products and history.
Cliff Stamp
Member
Posts: 3852
Joined: Sat Dec 31, 2005 2:23 pm
Location: Earth
Contact:

Sharpening a Vagabond

#1

Post by Cliff Stamp »

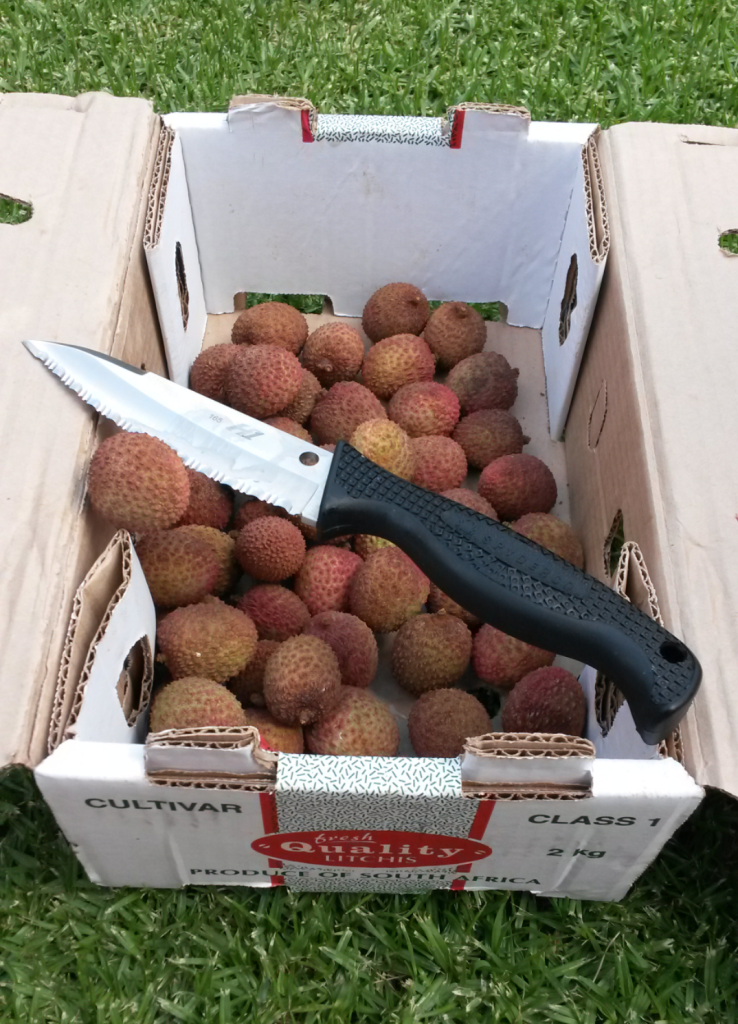
This is one of my favorite Spyderco fixed blades, The Vagabond :

Image

+

Image

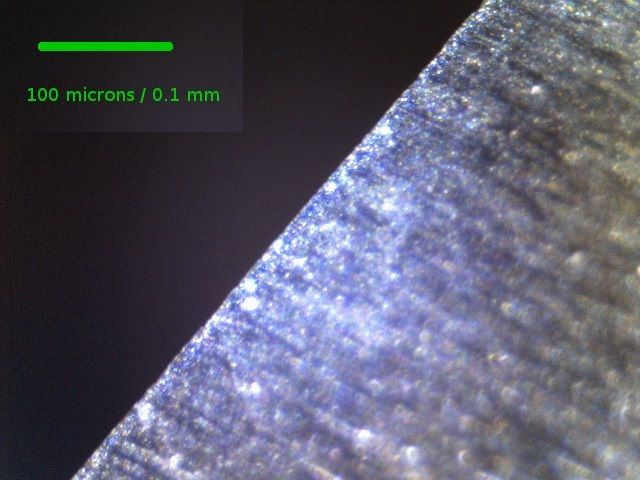
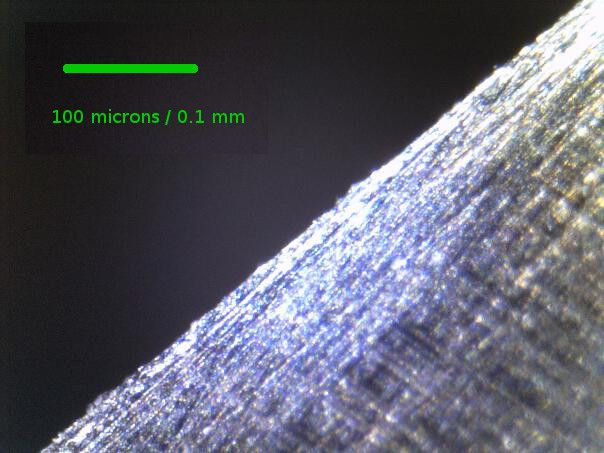
I had one when they first came out, it was stolen and I recently got this one as a gift. The edge has been sharpened, looks like it was burnished, possibly from a carbide scraper, it reflected light and would barely slice photocopy paper :

Image

The edge is 0.018" thick and ground at between 15 and 20 dps, it isn't perfectly even. As this is likely the first time this knife had the edge bevel ground I was going to have to do some serious metal removal to even out the bevels. I used a 300 grit Suehiro Ryu stone which is a pretty fancy dual-density stone :

Image

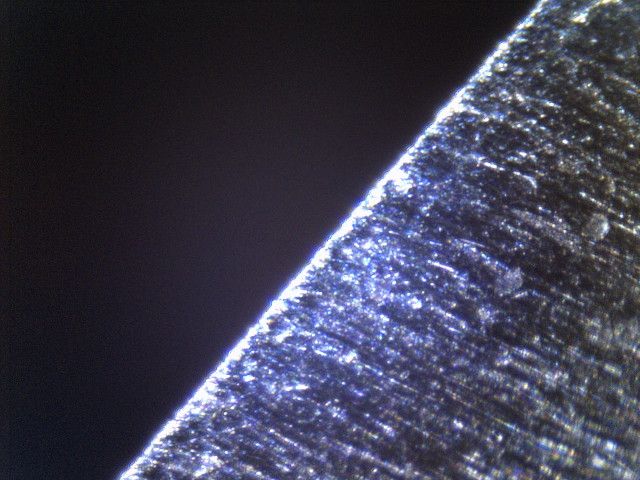
I used the soft side of the stone and 1/2 lbs of force (pressure was between 10 and 20 psi). This formed a very light slurry as it was just past the LCP of the stone, but well under the UCP. The stone cut well and quickly started evening out the edge bevel. After just 50 pps the edge would no long show any marker left on the edge, however the apex was not fully formed, still reflected light.

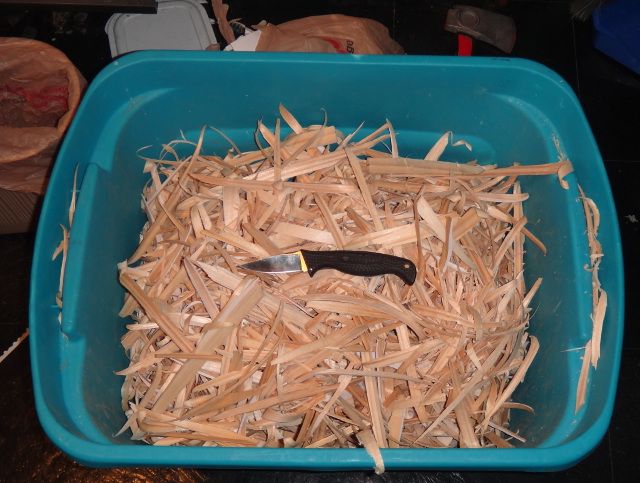
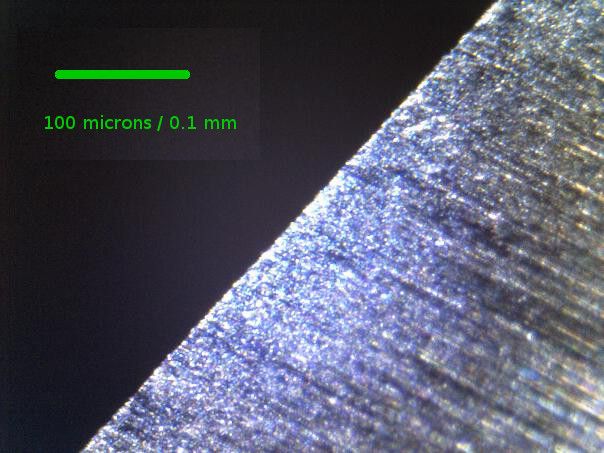
This is AUS-6 (same class as 12C27) which is a very nice cutlery steel. Unfortunately it gets used in the cheap knives a lot so it has a poor reputation but on a property level it is a stainless equivalent to 52100 (can reach ~60 HRC and has a very small amount, < 5% of chromium carbides). It is easy to grind, however since I was using a very low force and thus a small pressure it still took another 250 pps before the apex didn't reflect light :
Image

This is the current method of sharpening I am experimenting with, which was prompted by a discussion I had with Chum a few months ago. I would consider it advanced sharpening and would not in general advocate it over the normal 3-step method, but it has some advantages if you are willing to use a bit more technique.

The goal is to stop after the light stops reflecting from the apex, but before the apex fully forms. This may sound difficult, but it really isn't. I just checked the apex after every 50 pps which takes just a few second.

The apex is thus not over ground at all and left with a small flat (< 10 microns wide). The knife has the ability to slice newsprint ok, scrape shaves but won't push cut newsprint or catch hair above the skin. However it is extremely durable for very heavy work as it hasn't actually formed a true zero-apex. That small flat on the edge leaves is very durable for really heavy work like cutting sods.

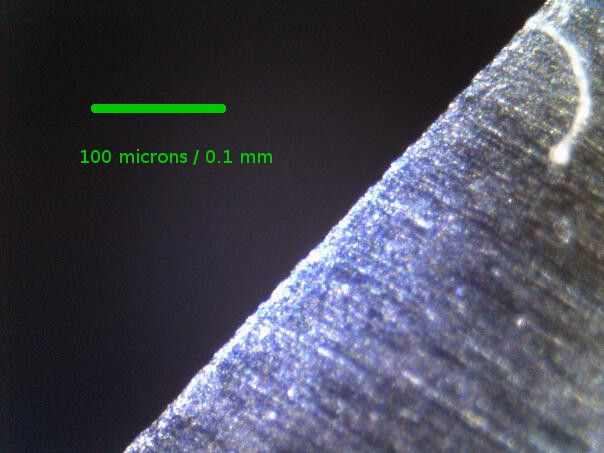
However even if you don't want that high durability there is also another reason to sharpen in this manner which is that is the perfect edge bevel to use to set the apex bevel, the main reason I do it. In this case I used a MXF DMT, a Spyderco Medium benchstone is another nice choice, which gives a high push cutting ability and still a decent amount of edge retention on a slice :
Image

That tiny apex bevel, was formed after just 5 pps on the MXF DMT. This produces a very high sharpness, cuts hair above the skin, push cuts newsprint, etc. but for heavy work like the sod cutting will take damage more readily.

Note there was no burr formation during any of this grinding so there is no burr removal used. As there is no over grinding there is zero wastage of steel, sharpening removed no material from the width of the knife. Those are two other reasons that this style of sharpening is becoming my regular method.
User avatar
sal
Member
Posts: 17058
Joined: Fri Sep 24, 2004 12:00 pm
Location: Golden, Colorado USA

Re: Sharpening a Vagabond

#2

Post by sal »

Wow Cliff! You have a Vagabond?

When I designed that model, I thought it would serve the camper market well. I was proud of the effort! We kept it a good size, convenient edge protection, we even made half dozen colors with plans for the future. We used 6A (Hachi A) as we felt it would be the best steel for the model. But reality always has a way of bringing us back. The product simply died. Nobody wanted it. Good for my humility, but not good for business. We changed the mold, which is now the Aqua Salt, which is being revived, but was still not as popular as I thought a corrosion resistant utility sized fixed blade should be.

Hang onto that one. The mold has been changed so there is no chance of a sprint.

Thanx also for using it s a test model and for the report. Great pics.

sal
User avatar
Ankerson
Member
Posts: 6930
Joined: Sat Jul 24, 2010 1:23 pm
Location: Raleigh, NC

Re: Sharpening a Vagabond

#3

Post by Ankerson »

That actually looks pretty good for a camping knife, food processing etc, maybe the blade could have been slightly longer, just thinking out loud here.

What was the feedback on it?

Back in the day I used to take a paring knife out in the field when camping for food processing.
Cliff Stamp
Member
Posts: 3852
Joined: Sat Dec 31, 2005 2:23 pm
Location: Earth
Contact:

Re: Sharpening a Vagabond

#4

Post by Cliff Stamp »

sal wrote: When I designed that model, I thought it would serve the camper market well. I was proud of the effort! We kept it a good size, convenient edge protection, we even made half dozen colors with plans for the future. We used 6A (Hachi A) as we felt it would be the best steel for the model.
Sal, I would have thought the exact same thing, however it has some issues. The main one is almost everyone I have given it to immediately makes the same remark :

"I would never trust that guard."

The initial reaction is that guard would come off in a pack and thus what most people ended up doing was leaving it in the handle and then putting in a sheath. There was also concern about it simply breaking off. It is one of those things where a design looks exceptional but it has one maybe non-obvious criticism which completely makes it not useful for a significant percent of the audience.

Now to be frank, I am not fully confident it would stay closed and what I always do is just put a thick elastic around it when it is in a pack or even in my pocket. I have done some testing by subjecting it to shock/movement and it is very difficult to get that guard to come off, but in the back of my mind I really don't want to reach into my pocked and catch my fingers on the edge.
User avatar
sal
Member
Posts: 17058
Joined: Fri Sep 24, 2004 12:00 pm
Location: Golden, Colorado USA

Re: Sharpening a Vagabond

#5

Post by sal »

Thanx. We tested it quite a bit and felt it would serve, but obvioulsy the market didn't trust it. At least that the conclusion we came to, same as yours. That's why we decided to change the mold.

sal
Cliff Stamp
Member
Posts: 3852
Joined: Sat Dec 31, 2005 2:23 pm
Location: Earth
Contact:

Re: Sharpening a Vagabond

#6

Post by Cliff Stamp »

Sal,

Do you recall how these were hardened, based on what I am seeing, if I had to make a first estimate I would say something like :

-1025C soak, forced air, shallow chil (at most), producing a hardness of 55-57 HRC.
User avatar
sal
Member
Posts: 17058
Joined: Fri Sep 24, 2004 12:00 pm
Location: Golden, Colorado USA

Re: Sharpening a Vagabond

#7

Post by sal »

I don't know. The maker is handling heat treat.

sal
Bodog
Member
Posts: 1752
Joined: Sat Oct 18, 2014 10:03 am
Location: Tierra del Sol, USA Earth

Re: Sharpening a Vagabond

#8

Post by Bodog »

I always thought it was a really cool design. Maybe marketed to a kitchen knife audience as the guard has less chance of coming off in a drawer. My wife would love something like that. She's cool with whatever's easiest. I always say she needs to throw the plastic sheaths back on the knives and she's always forgetting to do it. With something like that we could both be happy as she wouldn't have to go digging around looking for the sheath the day after cooking dinner.
They who dance are thought mad by those who do not hear the music.
User avatar
Brock O Lee
Member
Posts: 3320
Joined: Thu Jul 21, 2011 3:34 am
Location: Victoria, Australia

Re: Sharpening a Vagabond

#9

Post by Brock O Lee »

Cliff Stamp wrote: ...
Image
...
sal wrote: ...
We changed the mold, which is now the Aqua Salt
...
Interesting, something about that Vagabond seemed familiar, now I realize it's the handle.

Image
Hans

Favourite Spydies: Military, PM2, Shaman, UKPK
Others: Victorinox Pioneer, CRK L Sebenza 31, CRK L Inkosi
Tdog
Member
Posts: 1853
Joined: Sat Apr 30, 2011 7:04 pm
Location: The woods of Florida

Re: Sharpening a Vagabond

#10

Post by Tdog »

Thanks for the pics and reminder of the Vagabond....and Aqua Salt which is in my top 5 all time favorite Spydie list. The Aqua Salt begs to be held. The Aqua Salts have a permanent home on the boat. For those that didn't get the Aqua Salt in the past, the remake is highly recommended. An incredible design, thank you Sal.
User avatar
tvenuto
Member
Posts: 3790
Joined: Sun Apr 29, 2012 8:16 am
Location: South Baltimore

Re: Sharpening a Vagabond

#11

Post by tvenuto »

The Vagabond was certainly an interesting design, but having the guard in the handle essentially creates the same constraint that you have with a folder: the length of the blade must be less than the handle. I'm sorry to Vagabond fans, but if the worries about the guard (however unfounded) caused the creation of the Aqua Salt, then I say it was a good thing. Like Tdog, I think the Aqua Salt is just an amazing fixed blade design.
Invective
Member
Posts: 1124
Joined: Sun Jul 08, 2012 1:46 pm

Re: Sharpening a Vagabond

#12

Post by Invective »

I managed to snag a Vagabond a few years back at my gun shop and my one complaint is that the blade was too thick. It's a small knife but with 4mm stock it doesn't slice that well.
VashHash
Member
Posts: 4839
Joined: Mon Aug 03, 2009 2:49 pm
Location: Louisiana

Re: Sharpening a Vagabond

#13

Post by VashHash »

I used to keep my vagabond in my car. I think i need to put it back. I like the concept a lot and the handle is comfortable. Similar to a temperance with a little more aggressive texturing.

Also mine was featured in a spyderco calendar so it's practically a celebrity. :cool:
User avatar
Ankerson
Member
Posts: 6930
Joined: Sat Jul 24, 2010 1:23 pm
Location: Raleigh, NC

Re: Sharpening a Vagabond

#14

Post by Ankerson »

tvenuto wrote:The Vagabond was certainly an interesting design, but having the guard in the handle essentially creates the same constraint that you have with a folder: the length of the blade must be less than the handle. I'm sorry to Vagabond fans, but if the worries about the guard (however unfounded) caused the creation of the Aqua Salt, then I say it was a good thing. Like Tdog, I think the Aqua Salt is just an amazing fixed blade design.

I agree, I had one here and it was very nice, very well designed. :)
Cliff Stamp
Member
Posts: 3852
Joined: Sat Dec 31, 2005 2:23 pm
Location: Earth
Contact:

Re: Sharpening a Vagabond

#15

Post by Cliff Stamp »

Here is an attempt to do the same thing but instead use the Fine Spyderco ceramic to set the apex micro-bevel bevel.

Image

This is just starting to slice newsprint, 25 pps on the Ryu. This removed the previous apex bevel but didn't over grind. Using the Fine Spyderco to apply the apex bevel :

-5 pps, only slight improvement

-5 pps, starting to shave

-10 pps, catches hair above the skin

Image

The edge is slightly out of focus aside from the apex showing the higher angle of the apex bevel.
User avatar
Brock O Lee
Member
Posts: 3320
Joined: Thu Jul 21, 2011 3:34 am
Location: Victoria, Australia

Re: Sharpening a Vagabond

#16

Post by Brock O Lee »

Cliff Stamp wrote:Note there was no burr formation during any of this grinding so there is no burr removal used. As there is no over grinding there is zero wastage of steel, sharpening removed no material from the width of the knife. Those are two other reasons that this style of sharpening is becoming my regular method.
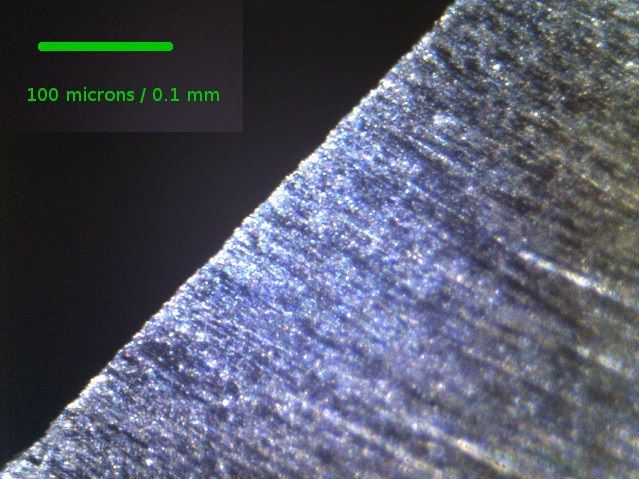
I started to do this during the last few months. I discovered it flows naturally as the next step when you try to minimize burr formation in the first place. Once you destress, sharpen and light stops to reflect you are fairly close to the apex. After a bit of practice you learn to judge when you are just about to apex. If you then apex with a micro bevel there is no burr to remove. Very cool, like you say, no steel wastage.
Hans

Favourite Spydies: Military, PM2, Shaman, UKPK
Others: Victorinox Pioneer, CRK L Sebenza 31, CRK L Inkosi
Cliff Stamp
Member
Posts: 3852
Joined: Sat Dec 31, 2005 2:23 pm
Location: Earth
Contact:

Re: Sharpening a Vagabond

#17

Post by Cliff Stamp »

Brock O Lee wrote: If you then apex with a micro bevel there is no burr to remove. Very cool, like you say, no steel wastage.
It is just that simple. A lot of people got the wrong idea and this it is terribly complicated, but you have it exactly. The thing that I like about this method is that it allows you to use very coarse stones for general sharpening which makes it very fast. Think about in general advocating jumping from a 300 grit stone to a 6000-8000 grit stone, most people would say it is crazy/impossible, however the above pictures show it is quite possible if you don't over grind. I think once you start doing this and realizing the benefits you would never return to over grinding.
User avatar
Brock O Lee
Member
Posts: 3320
Joined: Thu Jul 21, 2011 3:34 am
Location: Victoria, Australia

Re: Sharpening a Vagabond

#18

Post by Brock O Lee »

I think the key to this method is to cut off the old edge first, something you have advocated for a while now. Once you have a flat that can reflect light you have a visual way to judge if you are close to apex before you actually overgrind. A burr is the sure sign that you went too far. It annoys me to no end to see a burr when I sharpen, but I still get it wrong every now and again.
Hans

Favourite Spydies: Military, PM2, Shaman, UKPK
Others: Victorinox Pioneer, CRK L Sebenza 31, CRK L Inkosi
Cliff Stamp
Member
Posts: 3852
Joined: Sat Dec 31, 2005 2:23 pm
Location: Earth
Contact:

Re: Sharpening a Vagabond

#19

Post by Cliff Stamp »

Yes, it should be no more complicated than this :

http://www.youtube.com/watch?v=D-fq_36c0uc

This video is long, but only half of it is sharpening, the rest is conditioning a stone and some test cutting.

I used to strongly advocate checking the light reflecting however I don't advocate it as much recently because so many people complain it is impossible for them to do. I find it pretty easy but a lot of people struggle with it so it has its issues as a way to teach sharpening. I have been working on a few other ways to do it recently and have come to the conclusion that in general a combination of approaches works best and then you just find the one that is consistent for you.

For example I can't get consistent results with Murray Carter's 3-finger check. If you can do that then it would be perfect as you could be blind and use that and it requires no other media to test sharpness. As Carter argues, you always have your fingers with you. The problem is for me that it is very similar how a knife feels when it is under ground, over ground and even has a burr. I keep meaning to sit down and just spend some time with deliberating staging to see if I can develop that kind of sensitivity as it would be nice.
Cliff Stamp
Member
Posts: 3852
Joined: Sat Dec 31, 2005 2:23 pm
Location: Earth
Contact:

Re: Sharpening a Vagabond

#20

Post by Cliff Stamp »

A little more sharpening and edge retention work :

Image

The apex bevel was set with the Spyderco fine rod, the edge was ground but not over ground (no burr) with a Suehiro Ruy #300 dual density waterstone :

Image

FS point (final sharpness) was when the knife would no longer shave, even on a scrape (this is +/- 100 slices at best) :

-Initial performance : 1300 slices

-resharpen, 10 pps on the fine rod : 1100 slices

-resharpen, 25 pps on the fine rod : 400 slices

I would want to repeat this a few times and likely will to use it as an independent data set, but the general conclusions I have seen before. If you don't remove the fatigued metal on the apex then the edge retention starts to decrease as the damage builds up in use :

Image

That while light reflecting from the apex does so because it is squashed in.

50 pps, light force producing a low pressure (5-10 psi) to reset the edge on the Ryu but not over grind. The micro-bevel is gone, all of that light is gone, but it just barely slices newsprint which is about perfect for the new apex bevel.
Post Reply